Your Mac won’t boot up for some reason. You may fix it with Disk Utility and with some luck. The real worry is not that you cannot boot up the Mac; what worries you most is to recover data from MacBook that is being trapped due to a boot-up error.
Instead of panicking and making mistakes, you must take the right steps after encountering such a problem. The first step would be to stop using the system to not further damage the software and hardware components.
And once you have isolated the system, the next step would be to look for a resolution that can help you get back your trapped data inside a MacBook not turning on. Are there ways to recover your data from such a scenario? Fortunately, there are! In this guide, you get a way to recover data from MacBook, which is not bootable.
Tips for recovering data from MacBook
There are different ways that offer data recovery solutions when the MacBook won’t turn on. Among all the different solutions, we have handpicked some of the promising solutions trusted by many.
1. Recover data using time machine
Whenever there are any data loss scenarios, MacBook users first think about How to recover data from MacBook without much hassle. At this point, the first place a user looms for the data is in the backups. And in the case of Mac users, Time Machine.
A Time Machine is an in-built backup system that backs up all the data present in the device. However, to use this method, you need to have an external backup drive and ensure that the data you lost is in the backups.
- Enter macOS Recovery mode
- Choose Restore from Time Machine Backup in the utility folder and click Continue.
- Connect your external backup drive with the Mac
- Click Continue
- Now select the backups you want to restore in Time Machine and Continue
- Choose a location for your recovered data, click Continue
- Erase the disk you select above and click Restore
However, what’s bad news for most users is that they don’t take regular backups. So, when an emergency occurs, how to save their precious data? Let’s move to the second but the most effective way to recover data when your Mac doesn’t turn on.
2. Recover data using the iBoysoft data recovery tool
Another way to make things work out for you about how to recover data from MacBook is using data recovery software. Data recovery tools are powered by complex algorithms and are capable of accessing the data.
Data recovery software like iBoysoft Data Recovery for Mac makes things easier for users stuck with their sensitive information in the system. It is one of the most comprehensive softwares with all the features you need for data recovery.
Before starting with the data recovery, you must understand that you cannot download iBoysoft software on unbootable devices. So, you need to enter macOS Recovery mode and use the command line to download this software first, and then you can use it as usual. Here are the brief steps on how to recover data from MacBook using the software:
How to recover data from MacBook
Time Depends on File: 2 hours and 2 minutes
Step1
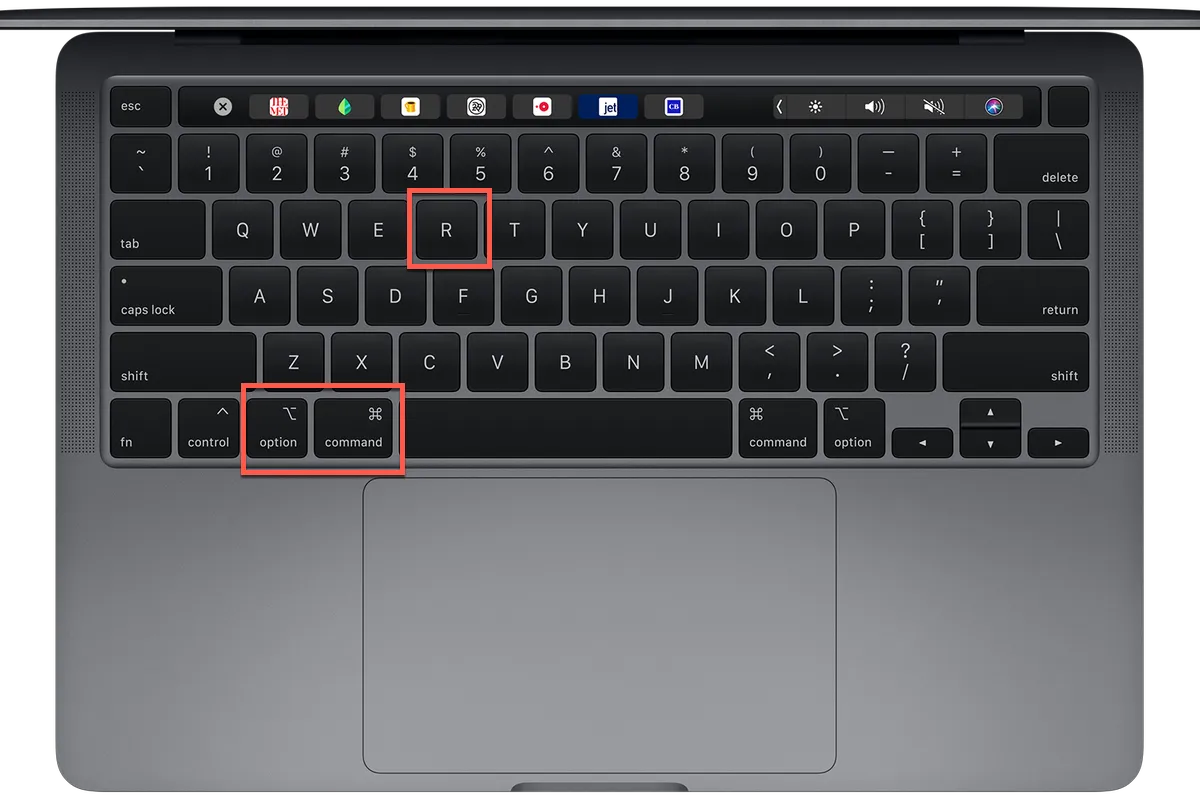
Boot your Mac into recovery mode by following this detailed picture.
Step 2
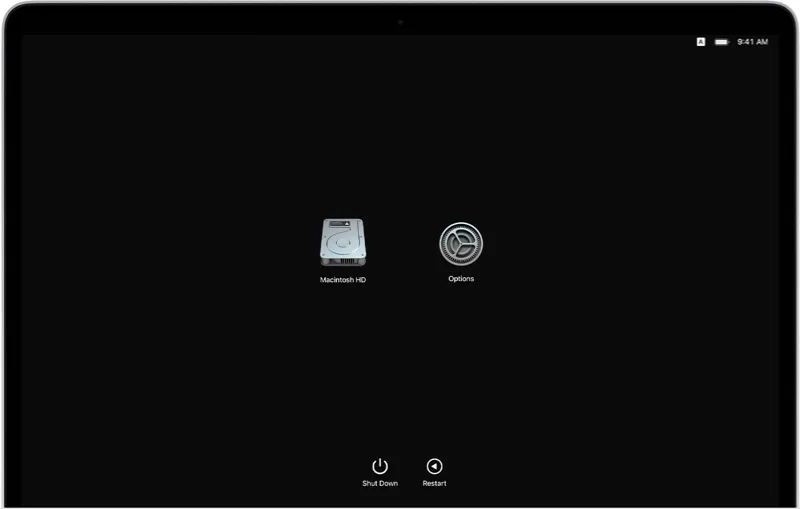

Make your Mac internet-connected since this method requires downloading.
Step 3
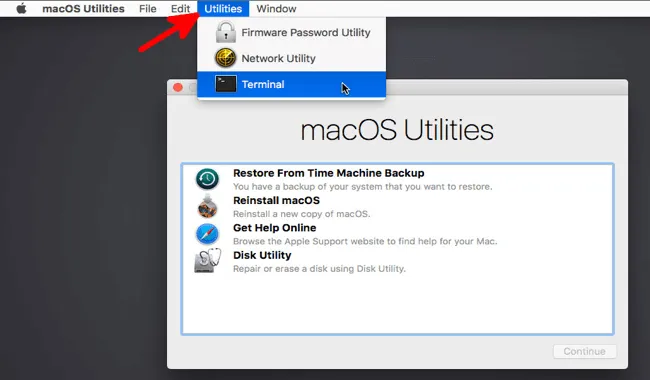

Click Terminal from the Utilities drop-down menu
Step 4
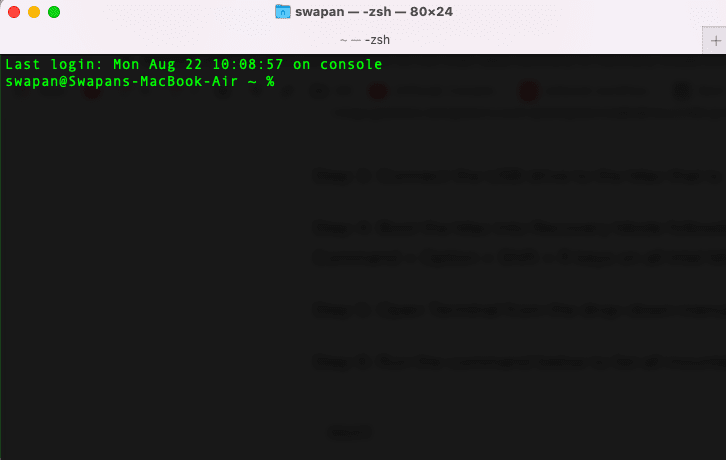

Type in the below command. It will launch iBoysoft Data Recovery for Mac in macOS Recovery mode. sh <(curl
Step 5
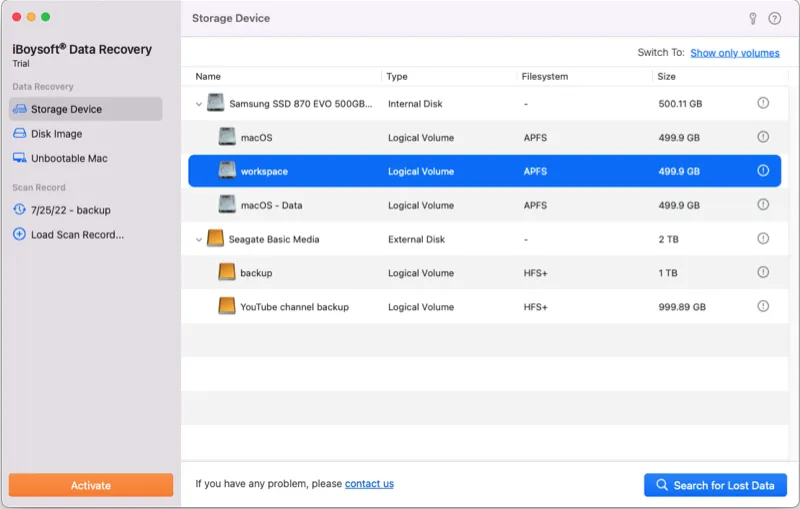

Select the Mac hard drive when you enter the software interface
Step 6
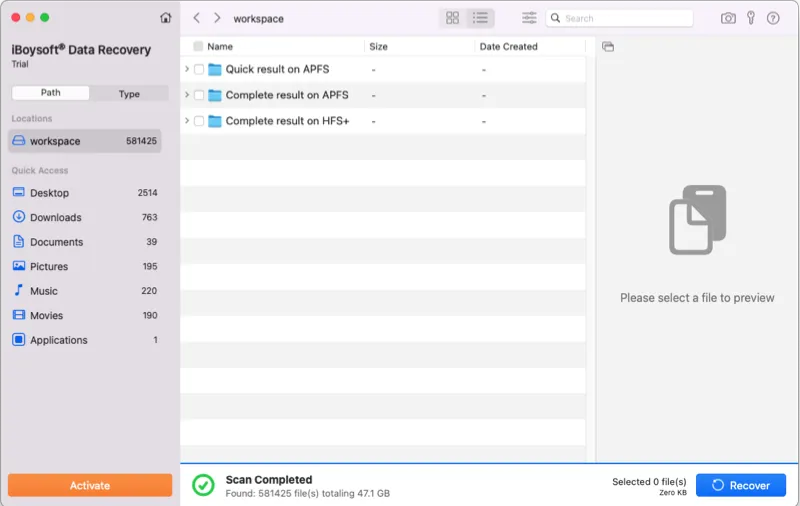

Click Scan. When the scanning results show up, you can preview and filter the files to better find the files you want to recover.
Step 7
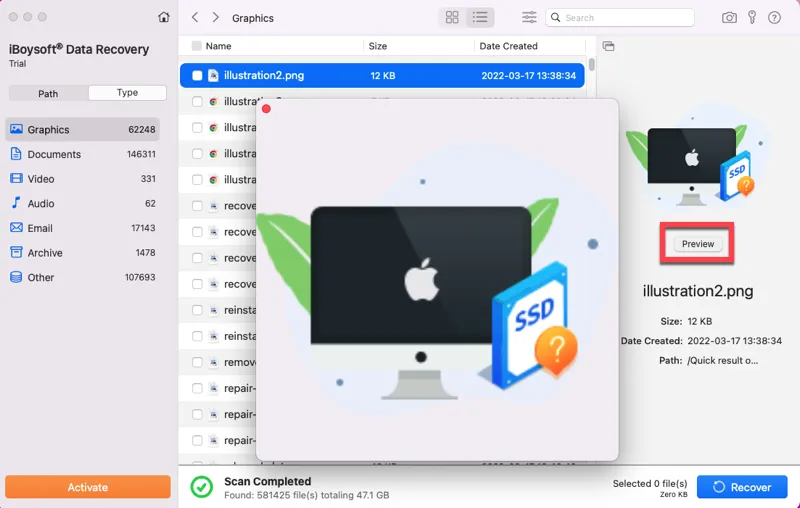

Click Recover. Remember to save your recovered files in a different location.
Supply:
- MacBook
Tools:
- iBoysoft Data Recovery for Mac
Materials: MacBook
Conclusion
Booting up errors is common when you are using a Mac system. Hence, you must have a data backup strategy to effectively get hold of the sensitive data. If you can effectively manage your data, you won’t have to go through such tiresome processes to recover your data.


